
Fix Your Student Housing Wi-Fi: When Laptops Won’t Connect But Phones Do
(And How I Fixed It in 10 Minutes)
The Confusing Problem
I recently moved into Yo-Kylä student village and brought with me a second hand Huawei LTE router. Nothing fancy, just something to provide Wi-Fi in my room. I plugged the Ethernet cable from the wall into one of the LAN ports and fired it up. Within seconds, my phone connected and was browsing smoothly. So far, so good.
But then I opened my Windows laptop.
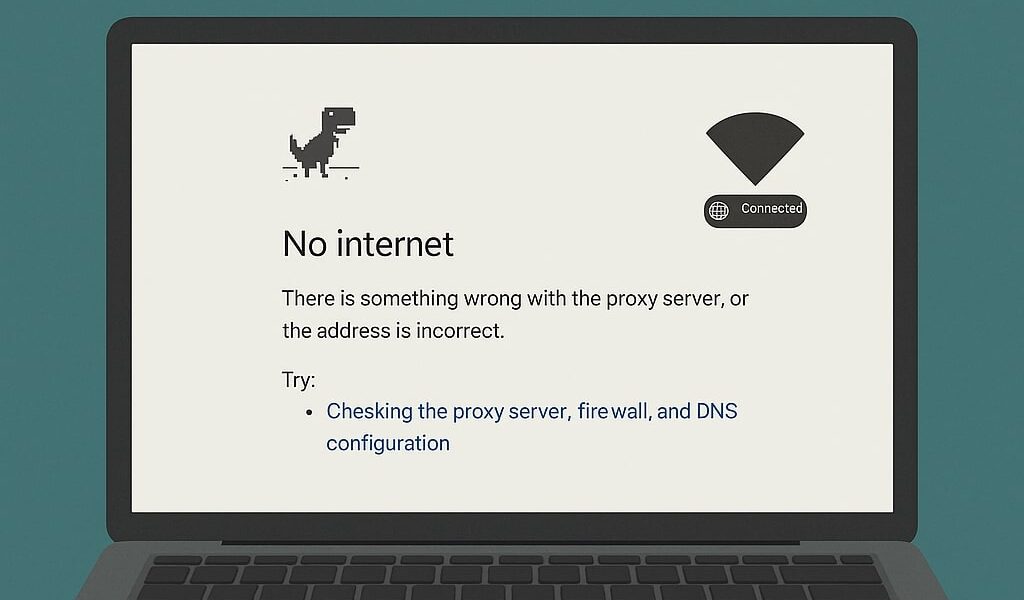
It connected to the Wi-Fi just fine. The signal was strong. But when I opened a browser, nothing loaded. No Google, no WhatsApp Web. I disconnected and reconnected. Still no luck. But here’s the weird part: the Wi-Fi icon said “Connected, No internet access”.
What?
First Clues
I opened Command Prompt and ran a few ping tests. Here’s what I found:
ping 192.168.1.1    # Router IP – Worked
ping 8.8.8.8        # Google DNS – Worked
ping google.com     # Timed out
Boom. That told me everything: the DNS was broken.
The laptop could reach the router and even public IPs, but it couldn’t resolve domain names. My phone, however, had no such problem. That got me thinking—why would one device work and the other not?
The Realization: It’s Not Just Me
This is common in student housing setups like Yo-Kylä.
Most of students use second-hand routers. Many of them:
- Don’t have WAN ports.
- Are set up in bridge/switch mode.
- Still hand out DHCP leases and DNS settings, even though they’re not truly functioning as routers.
So when you plug in your router and it tries to act like a real router, but isn’t routing DNS requests properly, Windows laptops choke, while phones quietly fall back to Google or Cloudflare DNS.
The Fix (Tech Guide)
If this is happening to you, here’s how to fix it in under 10 minutes.
Step 1: Confirm DNS Is the Issue
Open Command Prompt and type:
ping 8.8.8.8         # If this works
ping google.com      # If this fails
Your internet works, but DNS is broken.
Step 2: Set Public DNS Manually on Windows
- Open:
Settings → Network & Internet → Wi-Fi → Your Network → Hardware propertiesOr via Control Panel:Control Panel → Network and Sharing Center → Change adapter settings - Right-click your Wi-Fi adapter → Properties
- Select Internet Protocol Version 4 (TCP/IPv4) → click Properties
- Set:
- Preferred DNS:
8.8.8.8 - Alternate DNS:
1.1.1.1
- Preferred DNS:
- Click OK, close all windows, and reconnect to Wi-Fi.
Step 3: Disable IPv6 (Optional, but Helps)
- Back in the Wi-Fi adapter’s Properties, uncheck:
- Internet Protocol Version 6 (TCP/IPv6)
- Click OK.
Some Huawei routers give out broken IPv6 DNS settings, so disabling this avoids future issues.
Step 4: Clear DNS Cache
Open Command Prompt again:
ipconfig /flushdnsThen test:
nslookup google.comYou should now see an IP address instead of a timeout.
Long-Term Fix (Optional, If You Control the Router)
If your router allows you to modify DHCP settings:
- Log in to your router’s admin panel (
192.168.8.1or192.168.1.1) - Navigate to LAN / DHCP Settings
- Change DNS servers to:
- Primary:
8.8.8.8 - Secondary:
1.1.1.1
- Primary:
- Save and reboot.
All devices on your network will now get working DNS automatically.
Final Thoughts
In shared networks like those at Yo-Kylä student village, this kind of problem is surprisingly common. If you’re using an old LTE (4g) router as a switch or access point, your laptop might be getting incomplete or invalid DNS settings. Phones are smarter about working around that. Windows is not.
So next time your Wi-Fi is “connected” but nothing loads—don’t reset your laptop 5 times like I did. Just change your DNS.
Simple fix. Big relief.